The Art of Needle Felting: Creating Adorable Felted Creatures
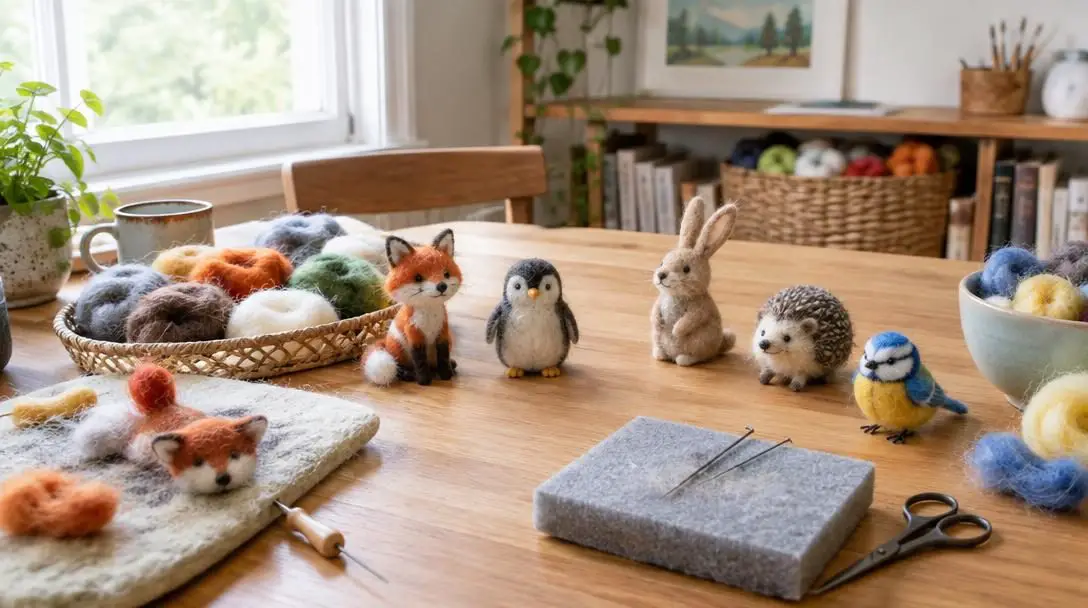
Needle felting has captivated makers across the crafting world, converting simple bundles of loose sheep wool into expressive, three-dimensional soft sculptures. From miniature woodland critters and fictional figures to colorful monsters and decorative forms, this accessible dry-felting technique delivers an appealing balance of sculptural precision and tactile warmth. Unlike traditional wet felting, which requires hot water, soap, and extensive manual friction, needle felting is an entirely mechanical process that relies on specialized barbed needles to compress and interlock raw fibers into solid shapes.
Whether you are an absolute beginner picking up your first felting needle or an experienced crafter seeking a tactile, meditative medium, sculpting with loose wool offers immense creative freedom. By understanding the microscopic behavior of animal fibers, outfitting your bench with the right basic tools, and following a systematic assembly workflow, you can reliably transform airy wool clouds into sturdy, charming figures that hold their shape for years.
Key takeaways
- Needle felting is a purely dry, mechanical craft that uses downward-facing needle barbs to tangle microscopic wool scales together.
- Rolling foundational wool tightly before stabbing it eliminates hidden interior air pockets and saves thousands of needle strikes.
- Sculpting major body parts in separate modules with loose fiber ends allows you to join pieces firmly without visible seams.
- Wire armatures, high-frequency shallow strikes, and multi-tonal fiber layering transform simple geometric balls into dynamic, posable characters.
- Porous wool sculptures cannot be laundered, making shadowboxes and scenic dioramas the ideal methods for long-term display and dust protection.
The internal mechanics of dry needle felting
To master needle felting, it helps to examine what occurs beneath the surface of the wool as you work. Natural sheep wool is far from smooth. Under magnification, individual wool fibers are covered in microscopic, overlapping scales that point toward the fiber tip. In untreated, combed bundles known as roving or sliver, these strands lie parallel and slide past one another effortlessly, maintaining a fluffy, light, and airy volume.
The craft relies on a specialized steel needle with directional barbs cut into its working blade. As you press the tool into the wool, these tiny downward-angled notches catch loose strands and push them deep into the core. This downward force drives the scaled fibers across adjacent strands, causing the microscopic scales to hook, bind, and lock into one another. When you withdraw the needle, the smooth upper sides of the barbs slide clear without pulling the strands backward, leaving the compacted fibers permanently tangled.
By repeatedly inserting and extracting the needle across varying angles, hundreds of gentle strikes progressively compact the wool bundle from the inside out. Over several minutes of focused work, the soft cloud undergoes a physical transformation, condensing into a dense, self-sustaining sculpture. This mechanical entanglement gives you total control over density, allowing you to carve deep indentations, sculpt rounded contours, and flatten decorative planes with exact placement.
Essential tools and workspace setup
One of the greatest advantages of needle felting is its remarkably low barrier to entry. Crafters do not need noisy machinery, chemical treatments, or dedicated studio spaces to produce finished work. However, selecting quality foundational implements directly impacts both your crafting speed and the structural integrity of your finished sculptures.
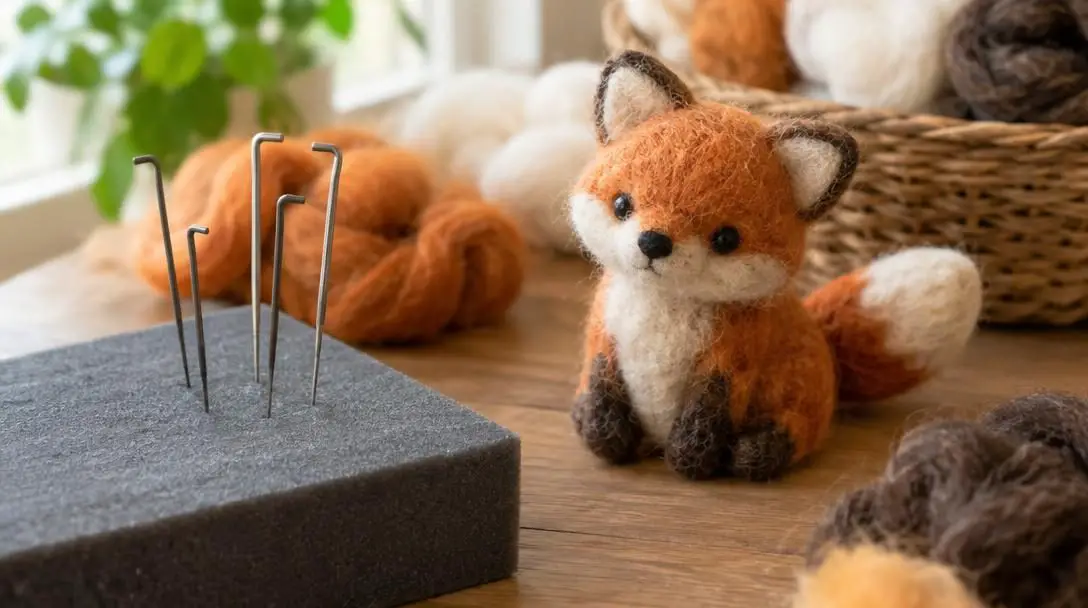
| Tool / Material | Primary Role | Key Characteristics | Best Stage of Construction |
|---|---|---|---|
| Carded Core Wool | Builds internal volume and foundational shapes | Coarser crimp, multi-directional fibers, rapid compression | Initial rough core building |
| Combed Wool Roving | Creates sleek outer finishes and detailed color | Aligned staple fibers, fine micron count, rich dye palettes | Final surface layering and details |
| Coarse-Gauge Needles | Moves large volumes of fiber quickly | Deep barbs, thick triangular or star shaft, stiff feel | Initial shape compacting and joins |
| Fine-Gauge Needles | Refines surfaces and attaches small accents | Shallow barbs, thin blade, leaves tiny, invisible puncture holes | Facial accents, ears, and smoothing |
| High-Density Foam Pad | Protects needles and tabletop surfaces | Firm, resilient surface that allows safe blade overtravel | All phases of assembly and flat work |
Your work environment demands deliberate organization. Because needle felting relies on repetitive hand motions with needle-sharp steel, proper ergonomics prevent fatigue and painful accidents. Set up your station on a sturdy, level table that does not wobble under pressure. Work beneath focused, glare-free task lighting so you can observe the precise entry angle of your tool and gauge the surface uniformity of your wool. Keeping your felting pad centered on your table ensures your non-dominant guiding hand stays visible and well clear of the strike zone.
Step-by-step guide to sculpting felted creatures
Constructing a balanced soft sculpture relies on methodical progression. Moving intentionally through planning, core compression, section assembly, and fine surface work preserves structural stability and symmetry throughout the build.
- Choose your creature design: Determine whether you are crafting an anatomically accurate woodland animal, a whimsical monster, or a stylized cartoon character. Establishing your subject early dictates the wool firmness you need, your color palette, and the level of structural complexity required.
- Create a rough reference sketch: Draw a simple two-dimensional silhouette on scrap paper to scale. Having a physical reference helps you check the proportions of the head, torso, and limbs as you sculpt, preventing the head from outgrowing the body as you add layers.
- Select colors and fiber textures: Assemble your palette of wool fibers in alignment with your sketch. Selecting varied fibers brings tactile depth to the creature, allowing you to suggest sleek skin, coarse outer fur, smooth feathers, or scaled ridges through diverse fiber crimps, color blends, and staple lengths.
- Roll the dense core shape: Gather a tuft of inexpensive carded core wool and roll it between your palms into a tight sphere, oval, or teardrop. Compressing the wool manually before piercing it eliminates large interior air pockets early, saving considerable time and arm effort during the initial compacting phase.
- Begin the initial compacting strikes: Place your tightly rolled core onto your high-density foam pad and begin piercing it systematically with a coarse-gauge needle. Rotate the piece continuously in all directions so the fibers draw together evenly from all sides rather than flattening into a pancake. Continue until the form feels firm, dense, and holds its silhouette independently.
- Build and join anatomical sections: Sculpt secondary components like the head, limbs, muzzle, and ears separately, always leaving a tuft of unworked, wispy wool at the attachment points. Position each part against the main body and push your needle directly through those loose fibers into the adjoining piece to knit them firmly together.
- Add fine details and surface colors: Once your overall silhouette is structurally sound, transition to a finer needle to install delicate facial expressions, color markings, and final textures. Lay thin wisps of colored wool across the surface, gently tacking them down to create crisp spots, expressive eyes, shaded fur patterns, or miniature noses.
Advanced techniques to elevate your character sculptures
Once you are comfortable with basic core construction and section assembly, introducing advanced sculpting techniques can transform static wool shapes into lifelike, dynamic art pieces.
Advanced felting techniques bridge the gap between simple geometric toys and expressive, gallery-worthy character sculptures.
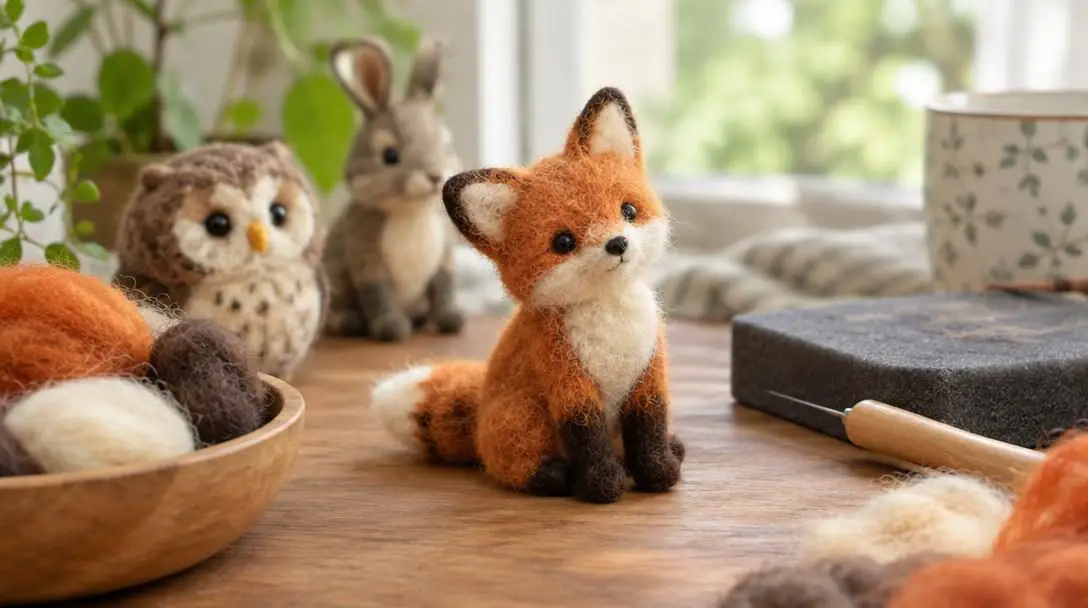
One primary method for enhancing realism is crafting intricate facial features. Instead of relying on flat dots for eyes, layer minute flecks of wool to produce multi-tonal irises, dark pupils, and tiny white light-catcher specks. Adding subtle fiber highlights along the brow line or shaping dimensional eyelids can inject instant character, curiosity, or melancholy into an animal's expression.
When forming thin, delicate structures like pointed ears, wings, fins, or tails, standard deep stabbing will not work. These components require shallow, high-frequency needle strikes while resting flat on the foam pad. Periodically peel the thinning wool off the pad and flip it over to ensure the barbs do not fuse your artwork permanently into the foam pores. Working back and forth along both faces builds crisp, dense edges that resist fraying.
For standing quadrupeds, long-necked birds, or posable characters, incorporate an internal armature made of flexible craft wire or pipe cleaners. Twisting a wire skeleton establishes proper proportions before wool is ever introduced. Wrap thin strips of core roving tightly around the wire limbs, coating the wire with a light smear of craft wax or glue if the wool slips, and felt firmly over the skeleton. This technique provides internal mechanical support, allowing you to bend legs, cock heads, and curl tails into expressive poses without weakening the sculpture.
Troubleshooting common needle felting mistakes
Because needle felting depends entirely on mechanical compaction, crafters often encounter predictable physical stumbling blocks. Correcting your hand habits and fiber preparation resolves the vast majority of structural problems.
- Snapping needle tips inside your project: Felting needles possess high tensile strength along their vertical axis, but they are brittle and cannot flex laterally. Never lever, pry, or change the angle of the tool while it is buried inside the fiber bundle. Always maintain a straight in-and-out path.
- Accidental finger punctures: Working on miniature appendages places your non-dominant fingers close to rapid needle strikes. Keep your guiding fingers well behind the point of impact, slow down your working tempo on delicate pieces, and keep the wool rested directly on the foam pad rather than pinching it in midair.
- Spongy, squashy foundations: If a sculpture feels hollow or collapses when squeezed, the core was not rolled tightly enough at the beginning, or the needle was not pushed deep enough into the center. Correct this by working inward with a coarser gauge needle until the core resists compression, or rebuild with a tightly coiled wool roll.
- Applying fine details too early: Tacking eyes, spots, or delicate muzzles onto an under-felted, squishy core causes them to sink inward and distort as you continue compacting the body. Always sculpt the underlying body part to its final firmness and shape before securing surface colors.
- Surface overworking and cratering: Piercing the exact same spot repeatedly with a heavy needle damages the wool cuticle, creating unsightly holes and pockmarks. To smooth rough textures, switch to your finest finishing needle, insert the tip at a shallow, grazing angle, and vary your puncture points across the surface.
Preserving and displaying your felted creations
A completed needle-felted sculpture represents hours of patient manual labor and deserves deliberate presentation that safeguards its delicate wool fibers. Because wool is naturally porous and holds microscopic crimp, finished figures cannot be submerged in water or washed without causing shrinking, fuzzing, and structural distortion.
One engaging way to showcase soft creatures is through themed dioramas. Setting your character into an environment crafted from natural elements—such as preserved sheet moss, dried twigs, river pebbles, polished driftwood, or miniature sea shells—creates a rich narrative world. These displays anchor the soft wool textures against contrasting organic surfaces, turning individual craft projects into complete sculptural vignettes.
For maximum protection against ambient hazards, mount your artwork inside glass shadowbox frames or enclosed glass display cloches. Enclosing your sculptures creates an effective physical barrier against airborne dust, pet dander, ultraviolet fading, and destructive textile pests like clothes moths. Sealed glass presentations also prevent casual handling, ensuring your wool sculptures maintain their crisp edges, precise surface details, and expressive silhouettes for generations to come.
Frequently asked questions
Can you wash a needle-felted creature if it gets dirty?
No, you should never submerge or launder a needle-felted item. Wetting and agitating compressed wool causes uncontrolled wet felting, which shrinks, warps, and distorts the delicate features. Instead, remove surface dust with gentle puffs of compressed air or a soft cosmetic brush.
What is the difference between core wool and roving?
Core wool consists of coarse, carded fibers tangled in multiple directions, making it quick and economical to compress into internal foundations. Roving consists of combed, aligned fibers with a smoother texture, designed primarily for outer surface coats, fur textures, and fine markings.
Why do my needle-felted pieces turn out lumpy or squishy?
Lumpy or squishy sculptures happen when the core wool is rolled too loosely before stabbing or when the needle strikes are too shallow. To achieve a smooth, firm result, wrap your core fiber tightly and insert your needle deep into the center from all angles until it offers firm resistance.
Do I need different needle gauges for one project?
Using multiple gauges produces far superior results. Coarser needles (lower gauge numbers) move fiber quickly to build internal bulk, while finer needles (higher gauge numbers) are necessary to refine surface planes, attach tiny features, and eliminate visible puncture marks.
Can children safely practice needle felting?
Older children can participate under close adult supervision, but the craft involves extremely sharp, barbed steel needles that easily puncture skin. Beginners of any age should work deliberately, keep their pieces flat on a foam pad, and consider wearing protective leather finger guards.
The bottom line
Needle felting remains one of the most accessible and rewarding branches of modern textile art, turning raw wool fiber into expressive, durable sculptures through simple physics. By respecting the mechanical nature of barbed needles, building upon firmly compacted cores, and working methodically through progressive stages, crafters of any skill level can bring charming, three-dimensional characters to life. With minimal equipment and a modest workspace, this tactile art form offers infinite possibilities for expressive creative storytelling.