5 Vegetables You Can Grow from Scraps
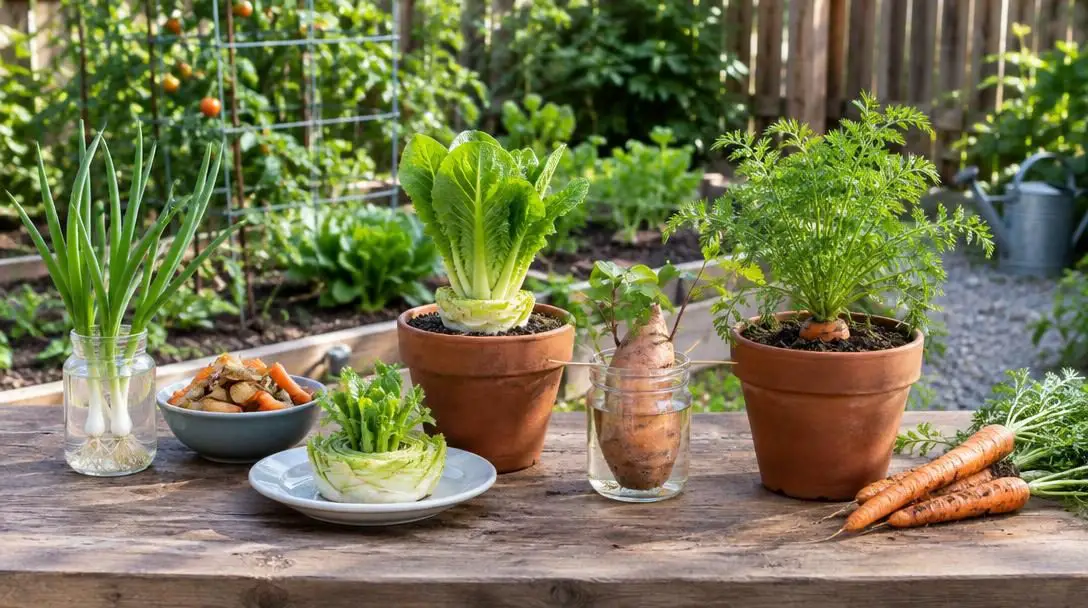
Cultivating a flourishing vegetable garden does not require acres of rural land, heavy agricultural machinery, or expensive envelopes of commercial nursery seeds. Fresh produce can thrive right inside an apartment kitchen, along a sunny windowsill, or outside on a small patio or deck. By understanding how common grocery items regenerate, you can turn kitchen scraps into a continuous, rolling harvest of fresh greens and root vegetables throughout the entire year.
Every time you prepare a meal, the trimmed bottoms of alliums, severed carrot tops, sprouting potato pieces, and celery hearts hold latent biological potential. Rather than discarding these remnants into the trash or compost bin, you can redirect them into clean water and potting mix. This approach dramatically reduces household food waste while establishing an affordable, resilient home garden that functions completely independent of traditional outdoor growing seasons.
Key takeaways
- Vegetable scraps contain dormant cells and nodal eyes capable of generating fresh roots, stems, and edible greens when given proper light and moisture.
- Water propagation provides a gentle initial rooting stage, but plants must eventually transition to nutrient-rich potting soil for mature development.
- Staggering your planting batches every two to three weeks creates a continuous harvest cycle that yields produce year-round.
- Common root crops like potatoes and sweet potatoes require vertical depth and slip propagation rather than standard surface planting.
The biological mechanics of kitchen scrap propagation
Regrowing kitchen produce relies on the natural evolutionary resilience of plants. Many cultivated vegetables contain specialized tissue capable of generating new structural growth, such as roots, stems, and foliage, even after the vegetable has been harvested and prepared for cooking. In root crops, celery, and alliums, the basal plate or growing crown retains dormant cells that awaken when exposed to clean moisture, ambient warmth, and sunlight. In tubers, nodal spots commonly called eyes possess the genetic instructions required to send out shoots that establish subterranean root systems.
Water propagation serves as a gentle intermediary step for many of these kitchen cuttings. By suspending plant bases or severed crowns in clean water, the surviving tissue absorbs hydration without the friction or resistance of heavy soil. This encourages tender root tendrils and emerging green shoots to form quickly. Once these foundational structures gain strength, the cuttings can be transferred into containers filled with potting soil, where they absorb essential minerals and mature into a harvestable crop.
By suspending plant bases in clean water, surviving tissue absorbs hydration without soil resistance, awakening dormant cells for rapid regrowth.
At a glance: scrap vegetable propagation requirements
| Vegetable | Starting scrap | Water rooting phase? | Recommended soil setup | Expected yield |
|---|---|---|---|---|
| Potatoes | Sprouted chunks with 2 eyes | No (dry sprouting) | Tall bucket with progressive soil layers | Full-sized tubers and baby potatoes |
| Celery | 5-inch root base | Yes (toothpick suspension) | Standard container potting soil | Regrown stalk bunch |
| Carrots | Top slice with 1/2-inch flesh | Optional (water or direct soil) | Quality potting mix | Edible greens and harvestable seeds |
| Sweet potatoes | Tuber halved across middle | Yes (sprout and slip rooting) | Spacious container potting soil | Mature sweet potato tubers |
| Alliums | Stem base with root fibers | Yes (shallow dish) | Potting soil or indoor containers | Continual greens, dividing shallots, and bulbs |
5 vegetables you can regrow from scraps
Potatoes
- Starting material: Chunks of sprouted potato with at least two eyes
- Primary container: Tall bucket or deep vertical container
- Substrate depth: 12 inches of base soil, built up to the rim
Potatoes are remarkably simple to propagate and provide generous yields when given sufficient vertical space. You can use any kind of potato for this method, including large baking potatoes, red potatoes, and smaller white potatoes. Rather than planting a whole potato directly into the ground, set a few tubers aside in a cool, dark location until the small indentations—commonly called eyes—begin pushing out distinct shoots.
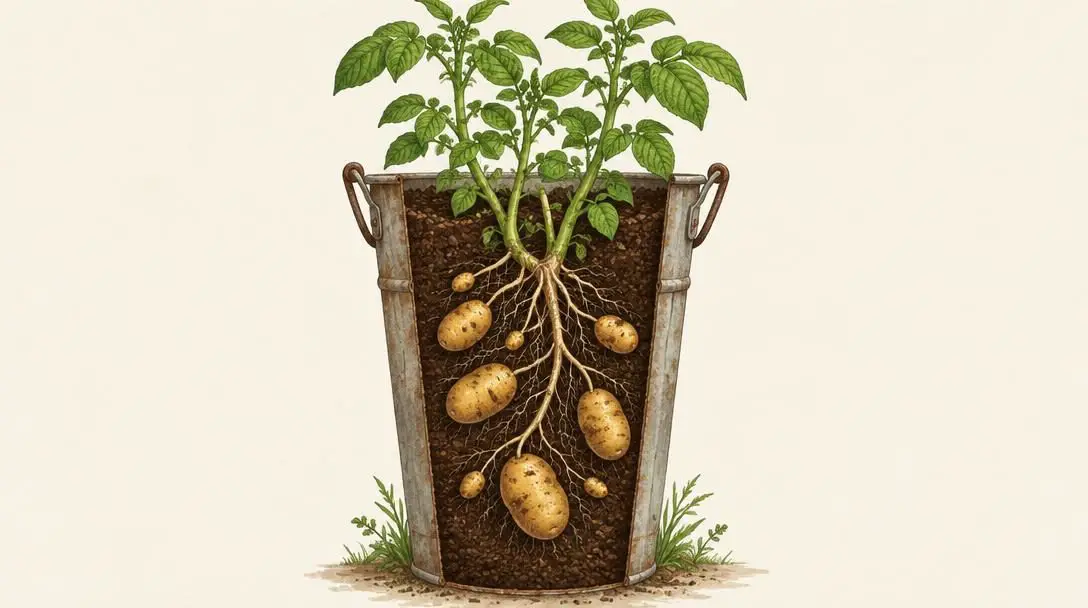
- Slice each sprouted potato into generous chunks, making sure each individual piece contains at least two healthy, active eyes.
- Select a tall container or bucket and add a base layer of 12 inches of dirt across the bottom.
- Plant the potato chunks roughly 6 inches down into the growing medium, positioning the sprouted eyes pointing upward toward the light.
- Cover the chunks with approximately 6 inches of dirt and water gently.
- As the green vine emerges and climbs, progressively add more dirt into the container until the soil reaches nearly to the rim.
This progressive soil-mounding technique prompts the buried stem to develop additional tubers throughout the entire vertical profile of the pot. A natural benefit of this vertical growing method is variety: the bottom potatoes will grow larger than the top ones, meaning if you enjoy tender baby potatoes alongside standard tubers, you get the best of both worlds.
Celery
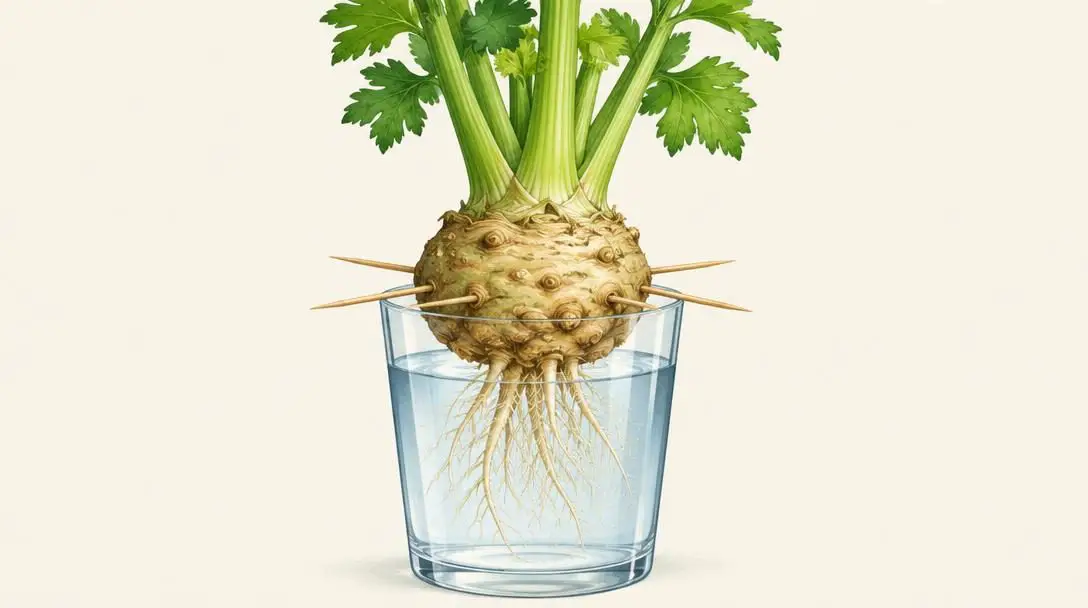
- Starting material: Lower 5 inches of the root base
- Support method: Toothpicks inserted 3 inches above the base
- Primary care: Water just touching the bottom root plate
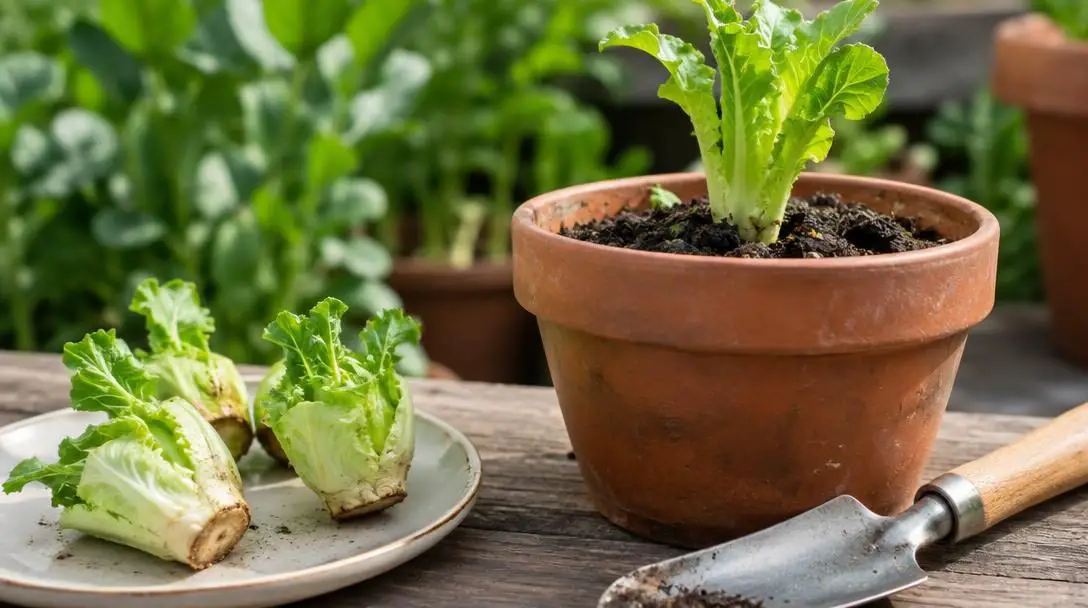
Celery bunches are often trimmed and discarded at the base, yet that dense root core contains everything needed to form an entirely new plant. The dense central core holds active growth tissue capable of sending up fresh stalks while simultaneously producing clean root tendrils beneath the surface.
- When preparing a bunch of celery, cut across the base roughly 5 inches up from the root end, keeping the bottom intact.
- Insert clean toothpicks around the perimeter of the celery base, spacing them approximately 3 inches up from the bottom to act as support braces.
- Fill a glass with water and balance the celery cutting atop the rim so the toothpicks rest on the glass edge.
- Adjust the water level so that the water just touches the bottom of the root base without submerging the stalks.
- Place the glass in an area that receives adequate light until green growth emerges from the center and root tendrils form.
- Transfer the cutting directly into a container filled with potting soil to let it mature into a full, fresh bunch.
Carrots
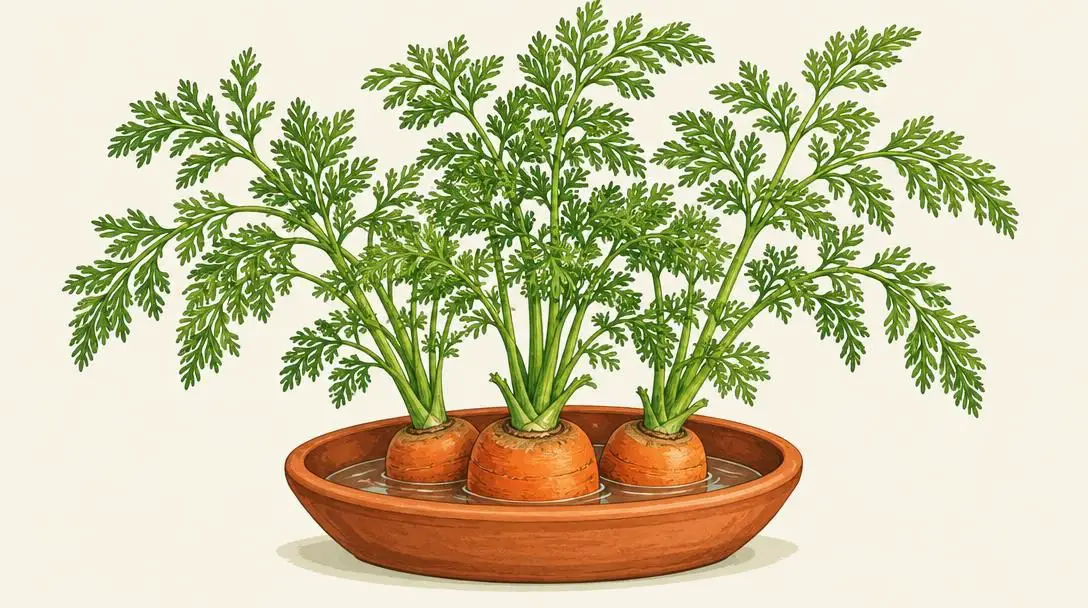
- Starting material: Carrot tops with a half-inch of orange flesh
- Rooting methods: Direct soil planting or toothpick water suspension
- End harvest: Edible green tops and viable seeds for future crops
While a severed carrot top will not regenerate a duplicate taproot directly, it can be regrown through two distinct methods to yield edible greens or to harvest seeds for a subsequent crop. Carrot foliage makes a bright, peppery addition to culinary dishes, and flowering plants yield true carrot seeds that can be planted for a completely fresh root crop.
- Slice the tops off fresh carrots, leaving approximately a half-inch of the orange carrot flesh attached to the leafy crown.
- Choose your rooting method: press the carrot tops directly into damp potting soil, or suspend them using toothpicks over a glass of water.
- If using water suspension, ensure the water level is adjusted so it just touches the bottom cut surface of the carrot slice.
- Keep the setup in a well-lit location until you observe the development of fresh root tendrils and vibrant green foliage sprouting from the crown.
- Once tendrils emerge, plant the carrot top into a pot of quality potting soil.
- Nurture the leafy growth to enjoy fresh greens, or allow the plant to flower and go to seed so you can collect mature seeds to grow full-sized carrots.
Sweet Potatoes
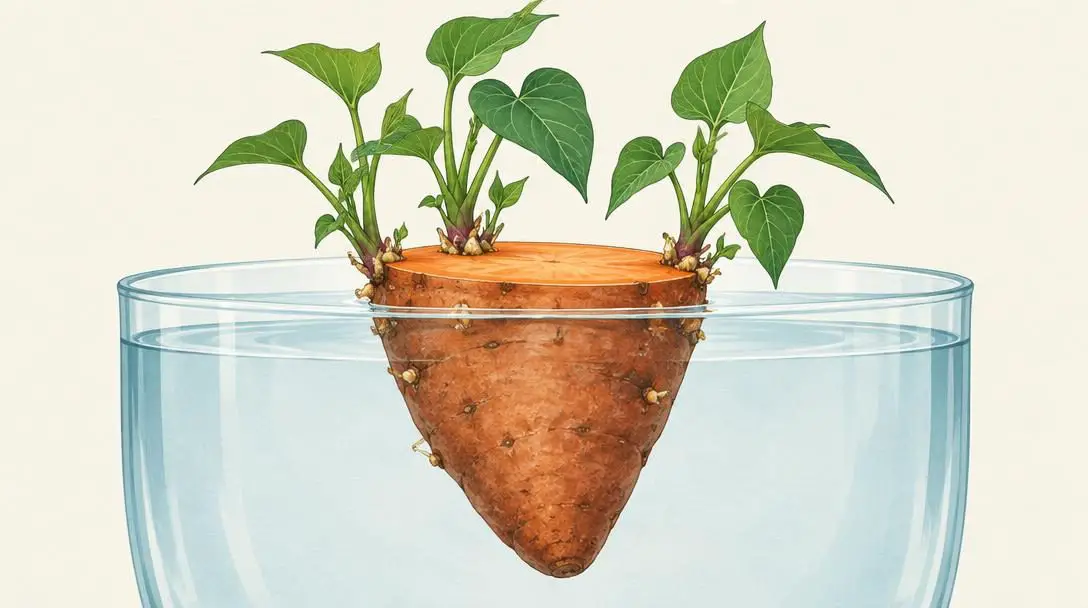
- Starting material: Tuber cut in half across the middle
- Sprout harvest height: 4 inches tall
- Propagation technique: Slip separation and secondary water rooting
Sweet potatoes belong to a different botanical family than standard potatoes, and their propagation method focuses on rooting the shoots—known as slips—that emerge from the tuber. Instead of burying chunks in deep dirt, you encourage the sweet potato to generate slender green shoots, which are then detached and rooted independently.
- Cut a healthy sweet potato in half across its middle.
- Insert toothpicks around the middle of each half to suspend the vegetable halves steadily over a shallow container of water, cut-side facing down into the moisture.
- Maintain the water level so the cut bottom remains wet while the upper portion stays dry and exposed to ambient air.
- Allow leafy sprouts to break through the skin and grow until they reach approximately 4 inches in height.
- Carefully cut these 4-inch sprouts off the sweet potato body, leaving the lower roots behind.
- Place these detached green cuttings upright in a clean container of water until a strong cluster of roots forms along the stems.
- Transfer the rooted slips into containers filled with potting soil to mature into new sweet potatoes.
Alliums: Scallions, Onions, Garlic, Shallots, and Leeks
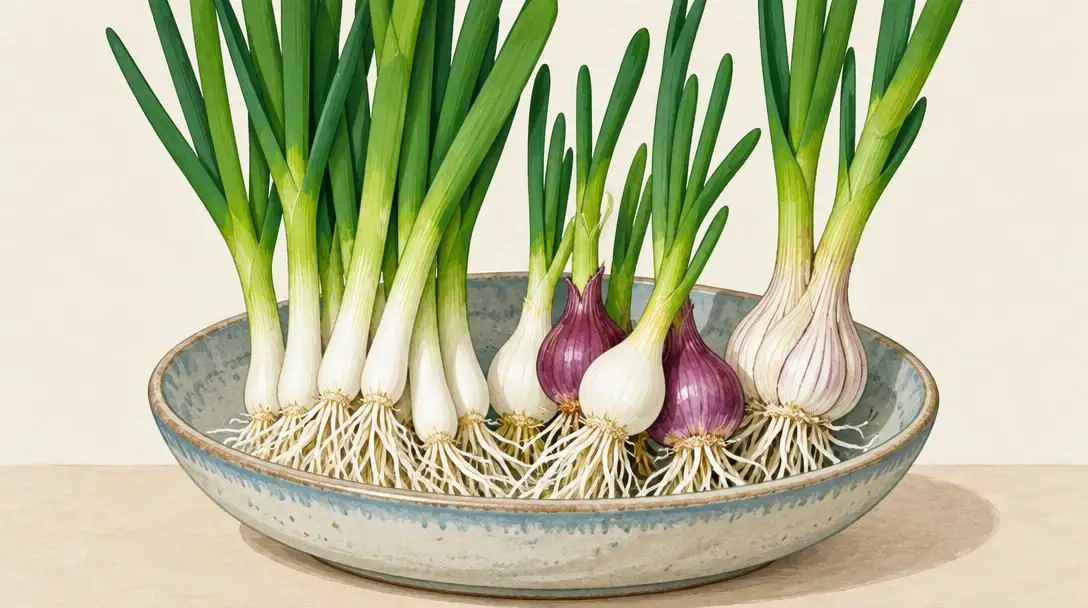
- Starting material: Intact basal plate with root fibers
- Rooting setup: Shallow dish with water just covering the roots
- Growth behavior: Rapid vertical sprouting; shallots divide beneath the soil
Members of the allium family are among the most dependable and fastest kitchen scraps to regenerate on a windowsill. Whether you are using scallions, standard onions, garlic cloves, shallots, or leeks, the dense basal plate at the bottom of the vegetable provides the foundation for new growth.
- Trim the vegetable, saving the base of the stem or bulb while making sure the small cluster of root fibers remains intact and undamaged.
- Place the root base upright into a shallow dish containing just enough water to submerge the roots while leaving the top cut edge exposed to the air.
- Set the dish in a bright indoor spot, replacing the water every couple of days.
- Snip and harvest the tender green growth as it climbs rapidly from the center of the cutting.
- Alternatively, transfer the rooted plants into soil containers so individual garlic cloves and onion bases can establish brand-new underground bulbs.
Shallots offer an especially high-value return when transitioned to soil containers. Shallots planted in the soil will naturally divide beneath the surface, meaning your harvest expands and gets bigger with every passing year.
Critical mistakes to avoid when regrowing scraps
While scrap gardening is accessible to beginners, simple oversights can impede growth or cause cuttings to rot before roots ever emerge. Keep an eye out for these frequent pitfalls:
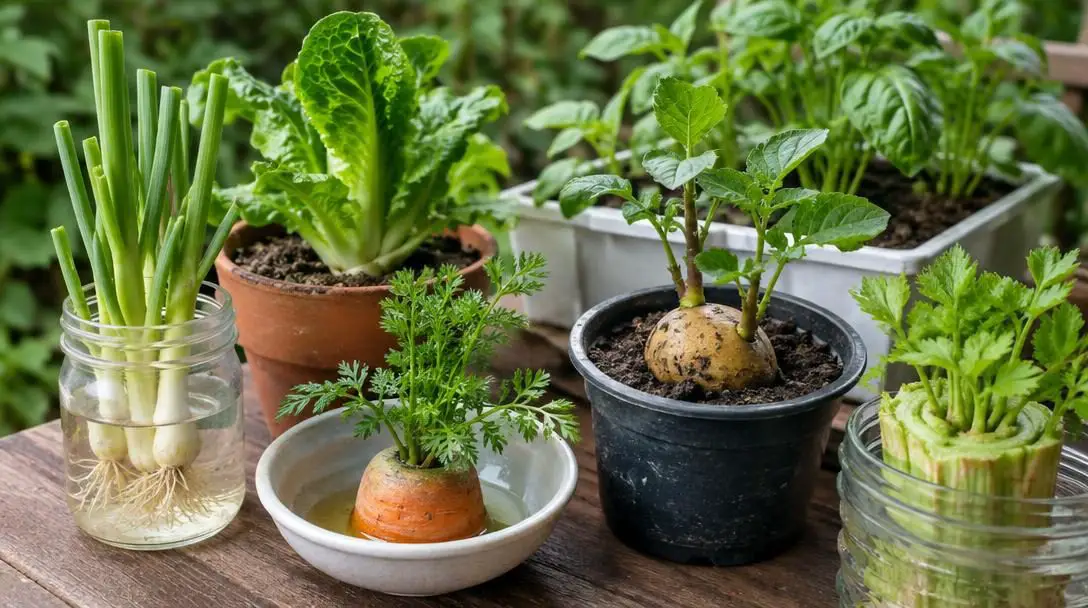
- Submerging the entire cutting in water: When using toothpicks or shallow dishes, it is vital that only the root plate or the very bottom of the cutting touches the water. Submerging the entire vegetable section cuts off oxygen and rapidly causes the scrap to rot before it can ever produce roots.
- Allowing water to become stagnant: Water left standing for days collects bacteria and depletes available oxygen. Refresh the water in your glasses and dishes every couple of days to keep it clean, clear, and odor-free.
- Ignoring dry indoor air: Vegetables grown indoors require adequate humidity to flourish. If the indoor air becomes too dry, delicate emerging leaves and new shoots can wither before establishing roots.
- Delaying the transition to soil: Water provides an excellent starting environment for root tendrils, but it lacks the long-term mineral nutrition that mature vegetables require. Once sturdy roots and leaves develop on celery, carrots, or sweet potato cuttings, move them promptly into potting soil.
- Planting sprouted potatoes too shallowly: Potatoes produce tubers along their buried stems. If you plant your sprouted chunks in a shallow tray or fail to add dirt as the vine ascends, the plant cannot form a substantial vertical crop of new potatoes.
Building a perpetual indoor-outdoor harvest system
Once you have mastered the basics of rooting kitchen scraps, consider establishing an organized system to maximize your yields throughout the calendar year. Rather than treating scrap propagation as an occasional science experiment, you can integrate it into your regular meal planning.
First, plan out a consistent planting calendar. By staggering your scrap plantings every two to three weeks, you avoid the feast-or-famine cycle of harvesting everything at once. This staggered routine ensures that as one container of scallions, celery, or potatoes reaches full maturity, another younger container is already developing behind it, keeping your kitchen supplied with continuous greens.
Second, assess your space and container inventory. If you are growing inside during colder months, locate the brightest spots in your home, such as south-facing window ledges. If your home has dry indoor air, consider grouping your containers together to help maintain a microclimate of ambient humidity. When warm weather arrives during the spring and summer months, you can effortlessly move your containers outdoors to a sunny deck, balcony, or patio to take full advantage of natural seasonal conditions.
Finally, manage your soil quality and container sizes carefully. Plants grown in containers require well-draining soil mixes to prevent root compaction. As perennial alliums like shallots continue to divide year after year, plan to separate and repot them into larger containers or fresh soil, ensuring your scrap garden remains productive and rewarding for seasons to come.
Frequently asked questions
Can you regrow a full carrot root directly from a carrot top?
A severed carrot top will not regenerate a single thick orange taproot. However, planting the top slice will produce vigorous, edible carrot greens, and if you allow the plant to flower, you can collect the mature seeds to plant completely new full-sized carrots.
How often should I change the water for rooting kitchen scraps?
You should refresh the water in your glasses and shallow dishes every couple of days. Stagnant water quickly depletes oxygen and harbors bacteria, which will cause the scrap to rot before it can form healthy roots.
Do sprouted potatoes need full garden beds to produce a harvest?
No. Potatoes thrive in tall buckets or deep containers. By starting with 12 inches of dirt at the bottom and progressively adding soil as the plant climbs toward the rim, you encourage tubers to form along the buried stem in a compact vertical footprint.
What is the difference between propagating regular potatoes and sweet potatoes?
Standard potatoes are grown by planting tuber chunks containing eyes directly into soil. Sweet potatoes are grown by suspending the tuber half in water to produce leafy shoots called slips, which are then detached, rooted in water, and planted into soil containers.
Can I keep scrap vegetables growing indoors all year round?
Yes. If your indoor environment provides sufficient light and isn't too dry, you can maintain container vegetables indoors throughout the entire year. In warmer spring and summer months, moving containers outside to a patio or deck can give them an extra boost.
The bottom line
Scrap gardening bridges the gap between everyday kitchen prep and sustainable food production. By understanding the simple biological cues that prompt roots and foliage to emerge, you can turn trimmings from potatoes, celery, carrots, sweet potatoes, and alliums into an endless source of fresh produce. With a few containers, clean water, and quality potting mix, any windowsill or small patio can transform into a productive, perpetual kitchen garden.